Editing a door...
As part of our project to make our house extra-comfortable and nice for its new owner (that is to say, catching up on deferred maintenance), I'm fixing the screen door to our screen porch.
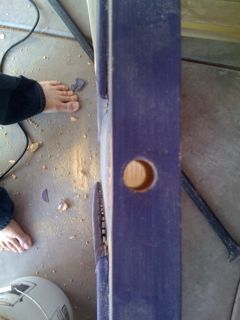
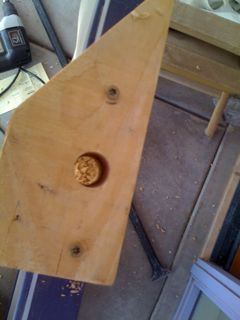
The door was installed by a cheapskate who used a lousy door handle/latch and didn't drill it properly. Here's the way the latch hole looks - notice how it's off center. It's also drilled at an angle.
The door latch/handle was a very cheap item with a mechanism that worked at one time, but failed pretty quickly. I have no idea how it ever worked at all. So one aspect of fixing the screen door was replacing the cheap doorknob/latch with a nice high-quality Schlage door handle and latch.
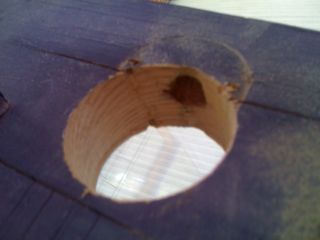
Here's the latch hole as seen through the handle hole. You can see more easily here that the latch hole wasn't drilled properly. In the picture here, I've already cut the hole for the handle.
The problem here is that because there's already a hole, which is the wrong size, if I try to drill a bigger hole, the old hole is going to guide the drill, and I'm going to wind up with a big disaster.
The correct way to solve this problem is to invest in a door boring jig. I can't stress enough how utterly great a jig like this would be. However, at $300, I'd be better off just buying a new door with the holes pre-drilled, because I'm only doing one door.
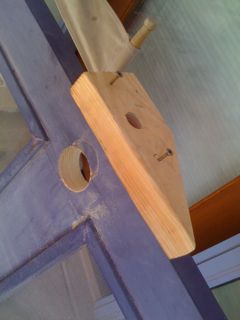
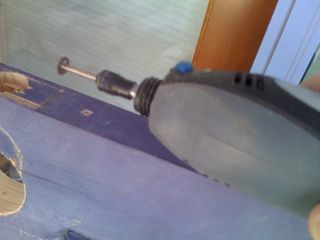
So I decided to try some advice I found on the internet, and make a cheap jig out of a piece of 2x4 scrap. In the picture here you can see the jig, which I've screwed to the door. The door boring jig clamps to the door, but I didn't want to build a jig that complex - this one took me about a minute to make.
It turns out that the drill bucks like a bronco when you try to use this jig. The drill bit I used is a real 7/8" drill bit that's 7/8" in diameter along its entire length, not one of those horrible paddle drills that have a little spade at the end that's flat. The problem with spade drills is that they're flimsy and difficult to control.
Unfortunately, with this jig, even my nicer drill bit was very hard to control. Because I hadn't driven the screws holding the jig in very far, the jig came right off the door. Not good.
So I drove the screws all the way in. The drill still bucked in the hole; what I finally did that worked was to start the drill with just a little bit in the jig, and then push it into the hole. This meant that it didn't take as big a bite when it hit the boring surface, and so it didn't buck as much. It was still pretty jumpy.

However, the latch hole came out nicely, pretty much where I wanted it. It wasn't perfect, like It would have been with the $300 jig, but it was close enough. The wooden jig prevented the drill from following the old hole, which was the main thing. People usually drill these holes by eye, and they come out okay. Back in the day you'd drill it with a brace and bit, which is a lot easier to control, owing to the lack of a motor. You'd still need a jig, though, if you were re-drilling a new hole over an old one.
I'll show you how I put in the mortise, not because I'm an expert, but just because you don't see a lot of pictures of carpentry work in progress on the internet, so I think even though I'm an amateur, pictures like this are still useful.
I marked the mortise by putting the latch into the hole and marking the outline of the faceplate with a pencil. I then cut along this mark with a Dremel tool. They usually tell you to use a pen-knife to do this, and in the hands of an expert, that's probably the right thing to do, but Dremel tools are less likely to puncture an artery if you slip (although they're still dangerous).
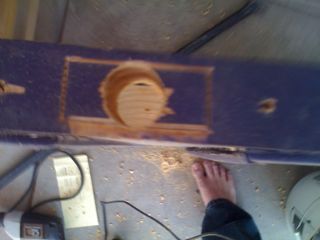
Here's what it looked like after I used the dremel, but before I used the chisel. The bare wood you see to the south is where I accidentally scraped the paint off while marking the door - i didn't chisel that part.
Unfortunately, I had trouble getting the iPhone to focus...
Here's what the mortise looked like when I was done. The trick to getting a good clean mortise is to go slowly and check frequently. Otherwise you could wind up going too deep.
By the way, if you operate the chisel by hand, be careful to keep the hand that's holding the door far enough away from the chisel that if you slip, you don't cut your other hand with the chisel. You can cut a tendon this way, which would be really bad. If you operate the chisel with a hammer, this isn't a big problem, because neither hand is in harm's way.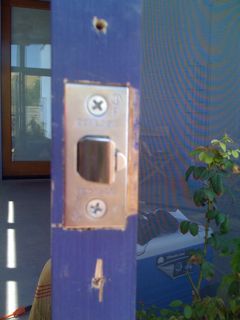
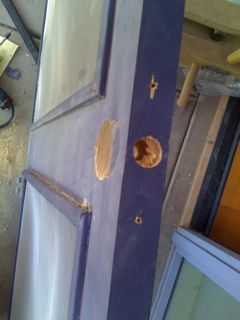
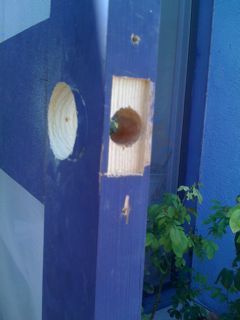
And here's what it looks like with the latch in place. I'm pretty happy with it - this is about the fifth mortise I've ever cut, and it looks pretty good. You can see where I slipped with the Dremel, which is a bummer, and there's a tiny bit of a gap above the mortise that I'll have to fill with wood putty before I repaint, but I'm not going to beat myself up about it.
The really embarrassing mistake I made on this job was to cut the hole for the door handle too big. I have no idea how I did this - I used the hole saw that I thought the documentation specified. I can only assume that I misread the documentation somehow. Sigh. Fortunately, the handle is held firmly in place by the cover plates, which are big enough to cover up my mistake, so it looks fine and works fine. Measure twice, cut once.
posted by Ted Lemon at 4:26 AM
![]()


7 Comments:
Hard to beat a nice wood bit; they're things of beauty.
Wear shoes when working with power tools.
I was wondering whether someone would point that out. The thing I'd be most worried about is chisels, but yeah, I should have been wearing shoes. The work was out on the back porch, and I didn't have to put on shoes to get there, so I got lazy... :')
Right there with you on the shoe advice, Anonymous. I told him the same thing!
I read that you should never use an augur bit for the edge hole. Use only a spade bit. I don't know why, but you had problems with the augur.
I suppose an augur bit would have a stronger tendency to pull in a particular direction, whereas a spade bit is less likely to be lead anywhere because its shape is so different than the shape of the hole it cuts.
Looks great! If you need any other advice with future adventures check out my site. http://thequickdoorhanger.com/changing-doorknob-hole-size/
P.s I agree with the shoes... You don't want this little piggy to go to the market for good. :)
Post a Comment
<< Home